Guide index
User manual
Calendar
The operational workspace for appointments, blocks, and requests.
Updated November 2026
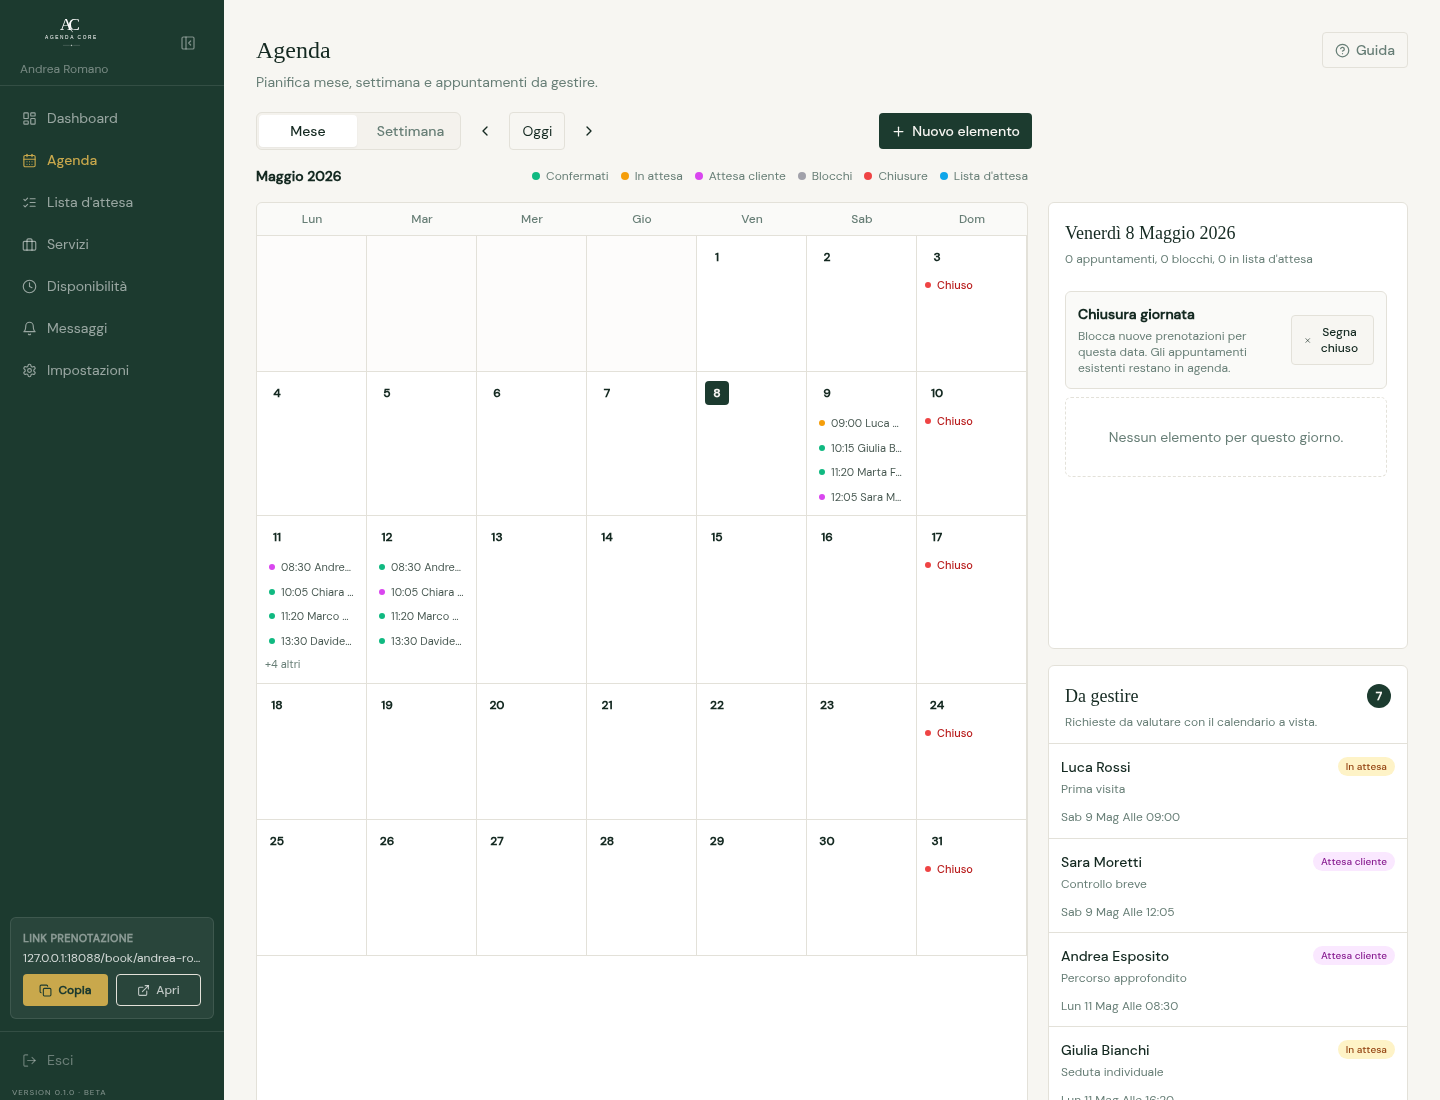
The Calendar is where you check your real workload. The week view helps you read time slots, while the month view shows distribution and busy days.
- The Calendar remembers the last selected view after you close the browser. A link that specifies a view still opens the requested one.
- Clients with an internal alias show it on larger cards and in appointment details. Hover over small blocks and month entries to read the name and alias. Pending requests show the same alias. Staff who only see Busy do not receive these details.
- A confirmed appointment occupies the slot and removes it from the public page.
- A pending request stays visible in the action areas until you confirm or decline it.
- A manual block occupies time like an appointment, but has no client attached.
- A change proposal puts the booking in the client's hands and is best tracked from the Dashboard.
- From the appointment start time you can mark it as a no-show: it stays grey in its original resource columns and in Week, while freeing the time for other bookings. Restoring attendance requires the original resources to be free; if they are occupied you see an error and the appointment stays a no-show. The record stays in client history and Statistics.
- No-shows recorded before this update have no saved original resources: resource columns keep their previous behaviour, and restoring attendance does not reassign resources.
- You can cancel an appointment: the slot becomes bookable again and the client gets notified on the configured channels.
How to read an appointment's resources
- Month, week, and list
- The colored badges below an appointment list every assigned resource, such as practitioner, room, and equipment.
- Colors in month view
- In month view each appointment's color shows its status, as in day and week views: green confirmed, amber pending, grey no-show. The resource name stays next to the client. In every view (month, week, and day) appointments that already took place use lighter colors.
- Column day view
- Day view is always available. Without additional resources it shows one timeline; when you manage multiple resources, each column represents one resource. An appointment that reserves several resources appears in every affected column; +N resources tells you how many other resources are involved beyond the current column.
- Resources filter
- Keep All resources selected to inspect the complete assignment. Filtering one or more resources hides the other columns or cards, but does not change the appointment's resources.
- On mobile
- Badges below the appointment card show every resource involved. Filter resources only narrows what you see.
Views, dates, and resource filter
- Choose Month, Week, or Day. Use arrows to change the period and Today to return to the current date.
- Open an appointment to see contacts, notes, service, status, and all resources. In Month, open the +N more summary for hidden items.
- Awaiting client confirmation marks approved future appointments without the client's attendance confirmation. Compact views use a clock icon; details show the text. The agenda refreshes every minute. Package sessions, tests and manual appointments without contact details do not show this notice.
- Select All or individual resources in the filter. If nothing appears, check the date and resources: an empty selection hides all appointments.
- On mobile use day navigation and Filter resources. The same appointment in several columns occupies several resources and remains one booking.
- On mobile choose Day, List, or Week; List shows cards in chronological order. On desktop Export downloads the appointments CSV: check the downloaded file before sharing it.
Operational calendar and To manage
- Open To manage for pending requests or requests awaiting a client reply. Select a request to open its detail on the correct date.
- In the Day panel check appointments, blocks, and the date's waitlist. Collapse the desktop panel and reopen it using the Day and To manage icons.
- Confirm a valid pending request. Awaiting client requires a reply from the sent link first; an expired request can no longer be confirmed.
- No open requests and No items for this day describe the current filter: change the date or filter before creating an item.
Create a manual appointment
- With no-show suggestions enabled, choose a saved client or enter their exact contact and choose a service and date. Flagged clients show available times at the end of the day or next to existing appointments. Selecting a suggestion fills the times; you can edit them or choose others. Public slots stay the same for everyone. The professional assistant can suggest the same criteria once it has identified the client.
- Select New or an empty cell, then Appointment.
- Enter date, start, end, and client name. Add email, phone, and a note if needed; choose an active service and compatible resources or keep automatic assignment.
- After three characters in the name field, matching clients appear by name, phone, email or alias. Each suggestion shows the name, phone and any alias. Select a row with the pointer or arrow keys and Enter: Agenda Core fills the contacts and links the appointment to that person. Escape closes the list. You can ignore it and enter a new client. Changing the name also clears copied contacts.
- Select Create appointment. End must follow start; if availability is rejected, adjust time or resources in the panel and retry.
Block a slot and manage a block
- From an empty cell choose Block or open Block slot in Calendar.
- Enter date, start, end, and label. With several resources choose the whole studio or a specific resource, then Create block.
- Open a manual block to change duration, label, or scope with Save block. Delete removes it and makes slots available again when other rules allow.
- Blocks are included in Free and Core. Manage a Google-imported event in its source calendar, rather than as a manual block.
Edit an appointment and client reply
- Open an appointment and select Edit. Set the new date and time, visit type, compatible resources, and an optional client message.
- Select Send change: status becomes Awaiting client. From the link the client can accept, cancel, or choose another slot.
- If the client chooses another slot, the request returns to Pending and needs your confirmation. An availability error does not confirm the change: adjust fields and retry.
- Edit package sessions in package management. Calendar detail identifies them but does not offer ordinary edit actions.
Reject or cancel
- Open the request and select Reject; for an appointment already managed use Cancel.
- Read the confirmation and confirm the action or go back. The slot is released and communications depend on configured channels.
- To close an expired request without messages use Archive as not performed.
Archive expired requests
- Open an expired request and choose Archive as not performed. Check the client in the dialog, then confirm.
- In Dashboard > Expired select visible rows or all rows in the filter and archive up to 50 requests per operation.
- The summary distinguishes archived, already handled, and errors. Retry unchanged requests only; history keeps Expired · not performed and no messages are sent.
Close and reopen a day
- In the Day panel open Day actions and choose to close the date. Reopen it from the same area.
- Closure prevents new public slots and remains visible beside the date. Check existing appointments: closing a day is not a cancellation command.
- For holidays or special hours also use Availability > Overrides. Reopening does not remove appointments or blocks still occupying the day.
Record a no-show and restore attendance
- From the start of a confirmed appointment open its detail and choose Mark as no-show.
- The appointment stays grey under its original resources and frees the time. If those resources have been booked again, restoring attendance shows an error and keeps the no-show. No-shows from before the update have no saved resources and restoring attendance does not reassign them.
- Correct a choice with Restore as attended. The outcome appears in client history and statistics; for package sessions also choose whether to consume or recover the session in package management.
Resource changes, buffers, and Google conflicts
- In desktop Day view use the appointment menu or drag it to a compatible alternative resource. The change affects the resource, not a new date.
- If Buffer not respected appears, read the affected interval and explicitly confirm the exception or cancel. An actual availability conflict is not resolved by ignoring the buffer.
- For a Google conflict use View calendar and Manage overrides. Check the event and appointment or manual override: the notice does not resolve the conflict by itself.